We Need To Talk About MACL
If you’ve never heard of MACL on MacOS, you’re not alone. This obscure feature is a hidden part of MacOS that underpins Apple’s concept of User-Intent, a shift in focus for MacOS privacy controls in an attempt to stop endless prompts interrupting the user. And by now we all understand just how annoying these alerts can be to us attackers.
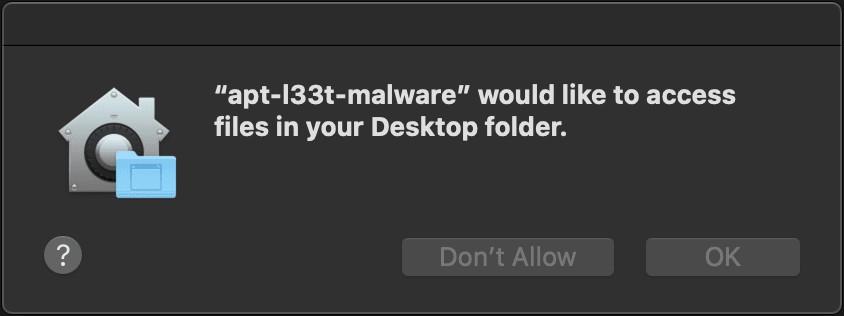
Being able to operate on an endpoint without giving the game away is of course essential, and unfortunately staying under the radar on MacOS is getting tougher with each release. Even once we’ve compromised the endpoint and elevated to root, much of the data stored in files is unavailable, and one wrong step can lead to the dreaded:

Now if you read this blog you’ll see that I have previously looked at bypasses for Apple’s privacy controls (also known as TCC) by loading dylib’s into specific Apple applications containing entitlements. That being said, I always like to have one or two esoteric techniques available for when those tougher jobs come up.
So in this post we’re going to look at just how MacOS’s User-Intent system works, expose its attack surface, and disclose a vulnerability (CVE-2020-9968) found while looking at ways to abuse the User-Intent functionality to bypass TCC.
Just What Is User-Intent?
During a recent conversation/hacking session with @rbmaslen we spent a bit of time looking at odd behaviour observed while tailoring a TCC bypass for a client. You may have seen this behaviour yourself, but if not, give this a go…
Using Catalina, open an application such as Visual Studio Code, choose File→Open to display the usual dialog and select any file on your Desktop. After clicking Open you will notice 2 things, first you will not receive the usual “Visual Studio Code would like to access files in your Desktop folder” prompt… and even if you block access to the Desktop folder for Visual Studio Code using privacy settings, you’re still going to retain access to the file.
After a bit of Googling to understand what was going on, this video from 2019’s WWDC conference explained a lot. The talk gives a brief mention of User-Intent vs User-Consent where we can see Apple trying to solve an issue which plagued Windows users during the rollout of UAC.
Apple’s solution with Catalina was to create a way of allowing a user to approve access to a file or directory without having to explicitly select an option via a dialog box every time. Now there are a few ways to see User-Intent in action:
- A user selecting a file via an Open or Save dialog.
- A user dragging a file from Finder onto another application window.
- A user double-clicking on a file in Finder.
And of course this logic stacks up, after all, if a user selects a file explicitly in a dialog box, why would you ever need to prompt them again for consent?
Now this is the point where an all consuming obsession to know why things work the way they do kicks in! It took me a few days to get my head around all the moving parts, but what I found was an impressive system which Apple have built to handle user privacy.
Let’s focus on the example of a user selecting a file via the Open dialog by crafting a small application. The full source code is available here, but for now we will focus on these 2 methods of selecting a file:
// Uses the open() syscall to open a file handle
- (IBAction)clickedOpenManual:(id)sender {
    NSString *val = [_openTextBox stringValue];
    int fd = open([val cString], O_RDONLY);
    if (fd > 0) {
        [[self->_logTextBox documentView] insertText:@"Attempting to open file: Success\\n"];
    } else {
        [[self->_logTextBox documentView] insertText:@"Attempting to open file: Failure\\n"];
    }
}

// Uses the Open dialog to choose a target file
- (IBAction)clickedOpen:(id)sender {

    NSOpenPanel* panel = [NSOpenPanel openPanel];
    [panel setCanChooseDirectories:YES];

    [panel beginWithCompletionHandler:^(NSInteger result){
        if (result == NSModalResponseOK) {
            NSURL*  theDoc = [[panel URLs] objectAtIndex:0];
            [[self->_logTextBox documentView] insertText:[NSString stringWithFormat:@"Selected file: %@\\n", [theDoc path]]];
        }

    }];
}
This small example gives us 2 ways to handle a file, either by directly calling the open() syscall on a path, or allowing the user to select a file via the Open dialog box:
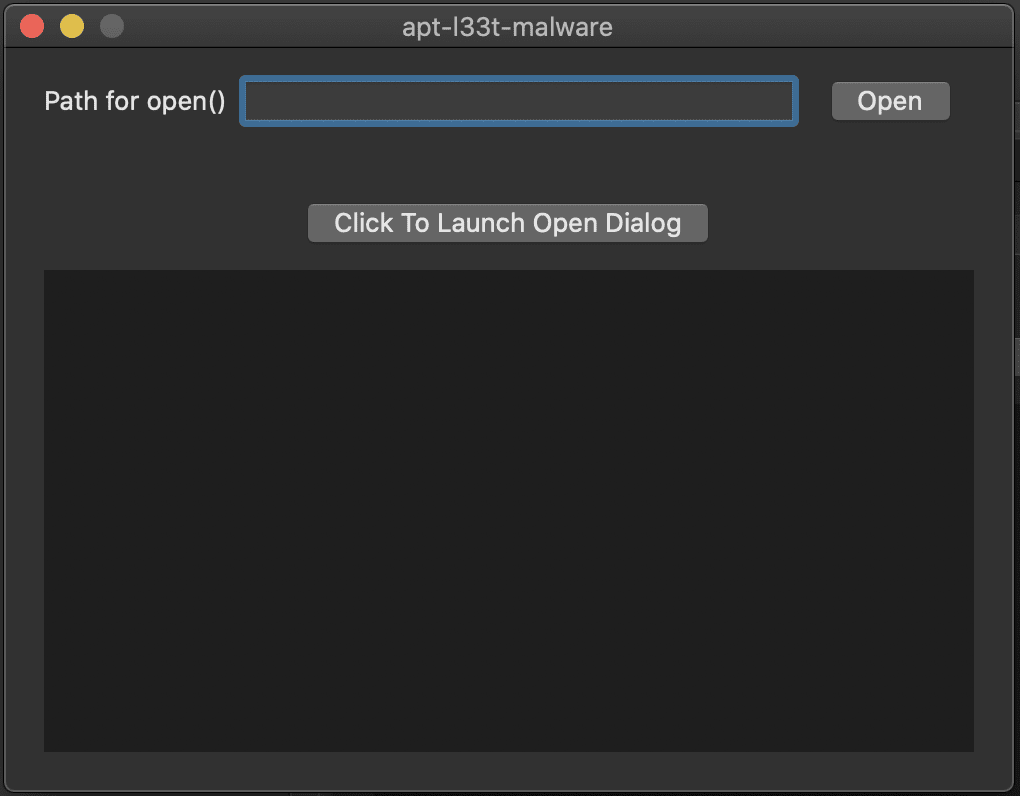
If we start with the open syscall and attempt to open a file on our desktop, we are greeted with the familiar dialog:
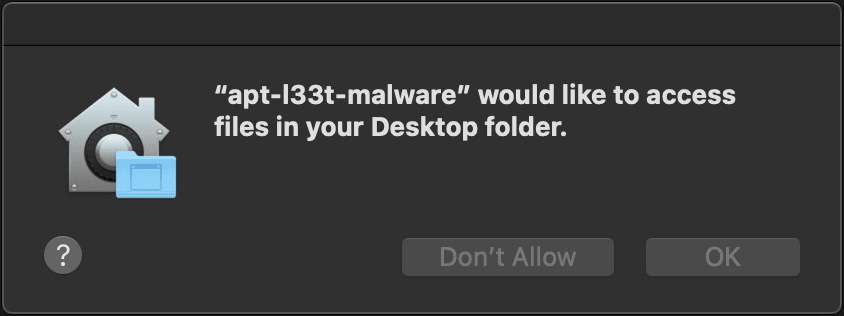
And if we select the “Don’t Allow” option, we can see that of course our attempt to open the file fails.
Next we launch the Open dialog and select the target file before selecting the Open option. Surprisingly this time everything works just fine, even though we have explicitly denied access:
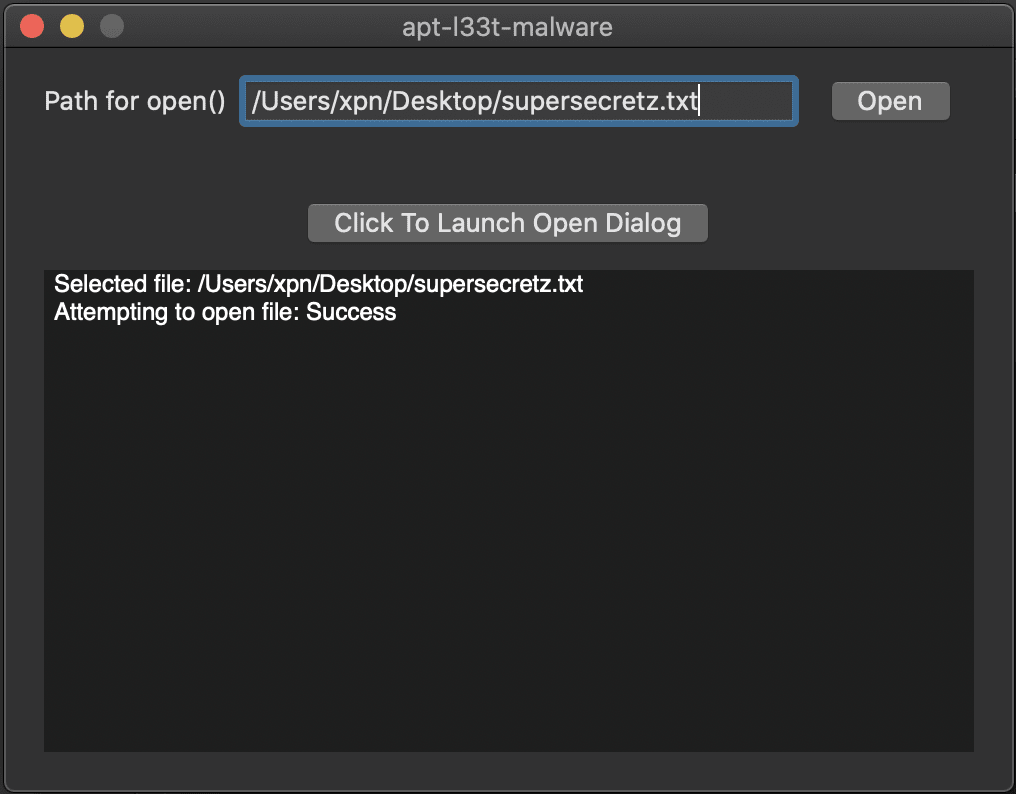
Further, if we restart the app and provide the path to the same file without selecting via the dialog this time, we see that the open method works fine:
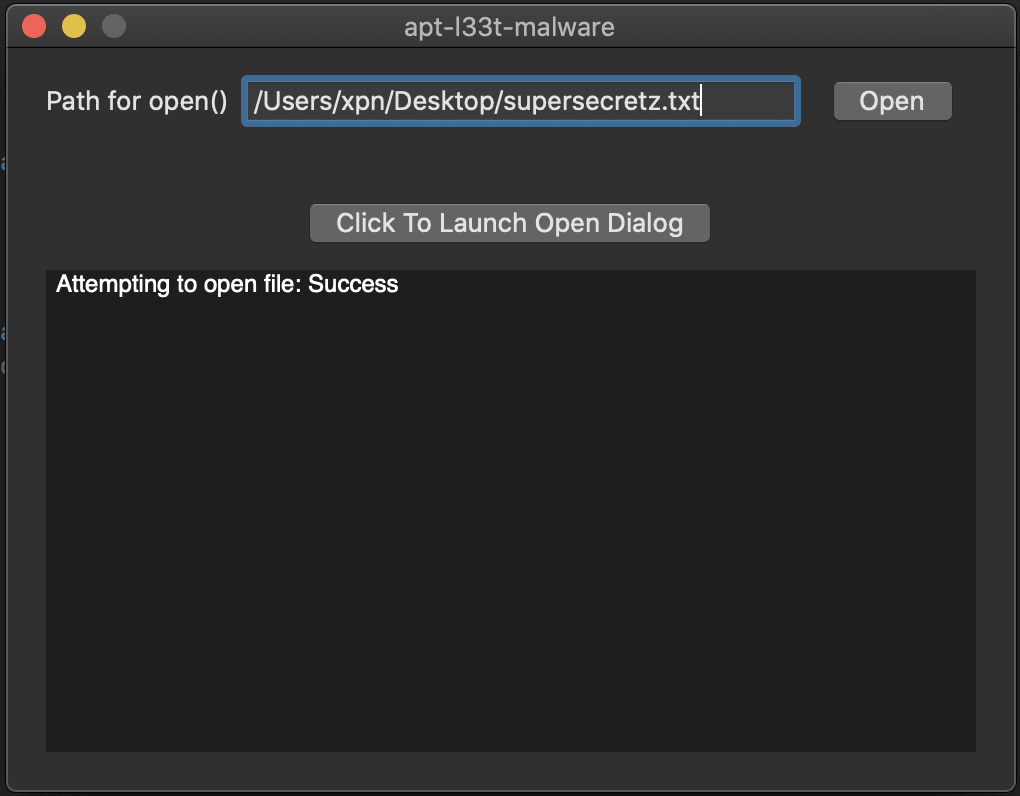
This is User-Intent in action, where MacOS is seeing that we have used the dialog to select a file which in turn gives our application permission to access its contents without forcing any further warnings.
Now this is where things get interesting, let’s take a look at any attributes applied to the file we selected using the command:
xattr -l ~/Documents/supersecretz.txt
What you will see is something like this:

And here we are introduced to the com.apple.macl attribute, which is the magic behind this functionality.
com.apple.macl
The MACL attribute usually consists of a header value of 02 00 followed by a UUID corresponding to the application permitted to access the file. The UUID is unique for each system, user and application meaning that we can’t preempt what this value will be in advance. I’m not too sure if this was implemented in this way due to privacy concerns (after all, this gives a nice artifact to see what files a user has accessed with an application) but in any case we know that if this MACL attribute has been added, the matching application and user can re-access the file without ever having to deal with privacy settings.
To show this in action, let’s take the MACL entry added to our test file above and apply this directly to another file such as ~/Desktop/secret.txt:
xattr -wx com.apple.macl 020091877181CB4E4D7F8004D7BFF6B58C58000000000000000000000000 ~/Desktop/secret.txt
As expected, we see that we can now open this file directly from our application without any need to bother with privacy settings:
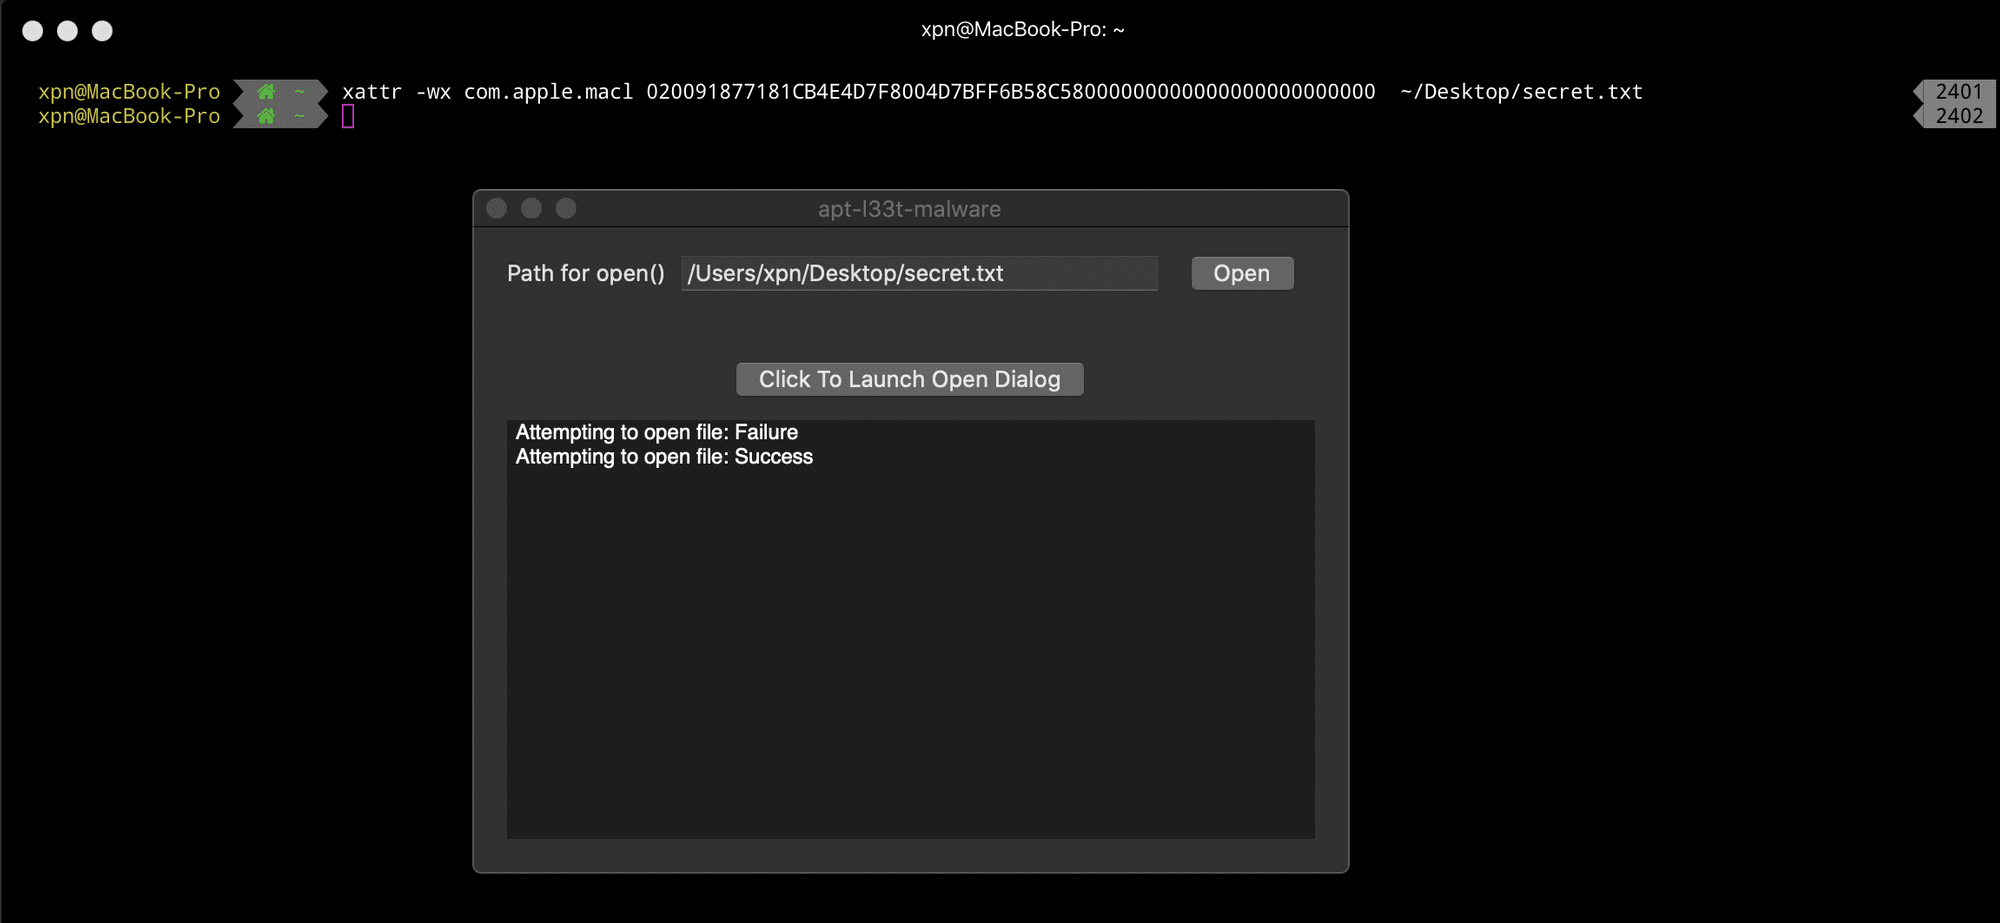
Now let’s try and remove the MACL from the file using:
xattr -d com.apple.macl ~/Desktop/secret.txt
Somewhat unexpectedly, we see here is that the MACL instantly reappears. This means that by design, once a MACL has been added to a file, it is difficult to remove it. Any attempts to do so will also be greeted with this message shown in Console:

How The Open Dialog Applies The MACL
So what makes the Open dialog so special and just how does the it add a MACL to a file it should otherwise not have access to? Obviously our own applications can’t just go around adding MACL’s willy nilly as that would be a pretty large hole in MacOS privacy controls, so something else is surely at play here.
Let’s start with the AppKit.framework library which is actually responsible for the Open dialog. What we find is that the framework consists of not only the AppKit library, but also a number of supporting XPC Services:
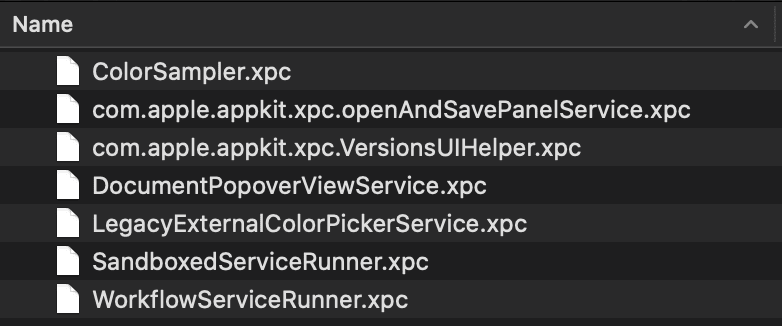
This is a common pattern used by Apple frameworks which allows entitlements to be assigned to a service which can then be requested using XPC from a library loaded into our process. The obvious XPC service which sticks out here is com.apple.appkit.xpc.openAndSavePanelService.xpc. When we look at its entitlements, we see this:
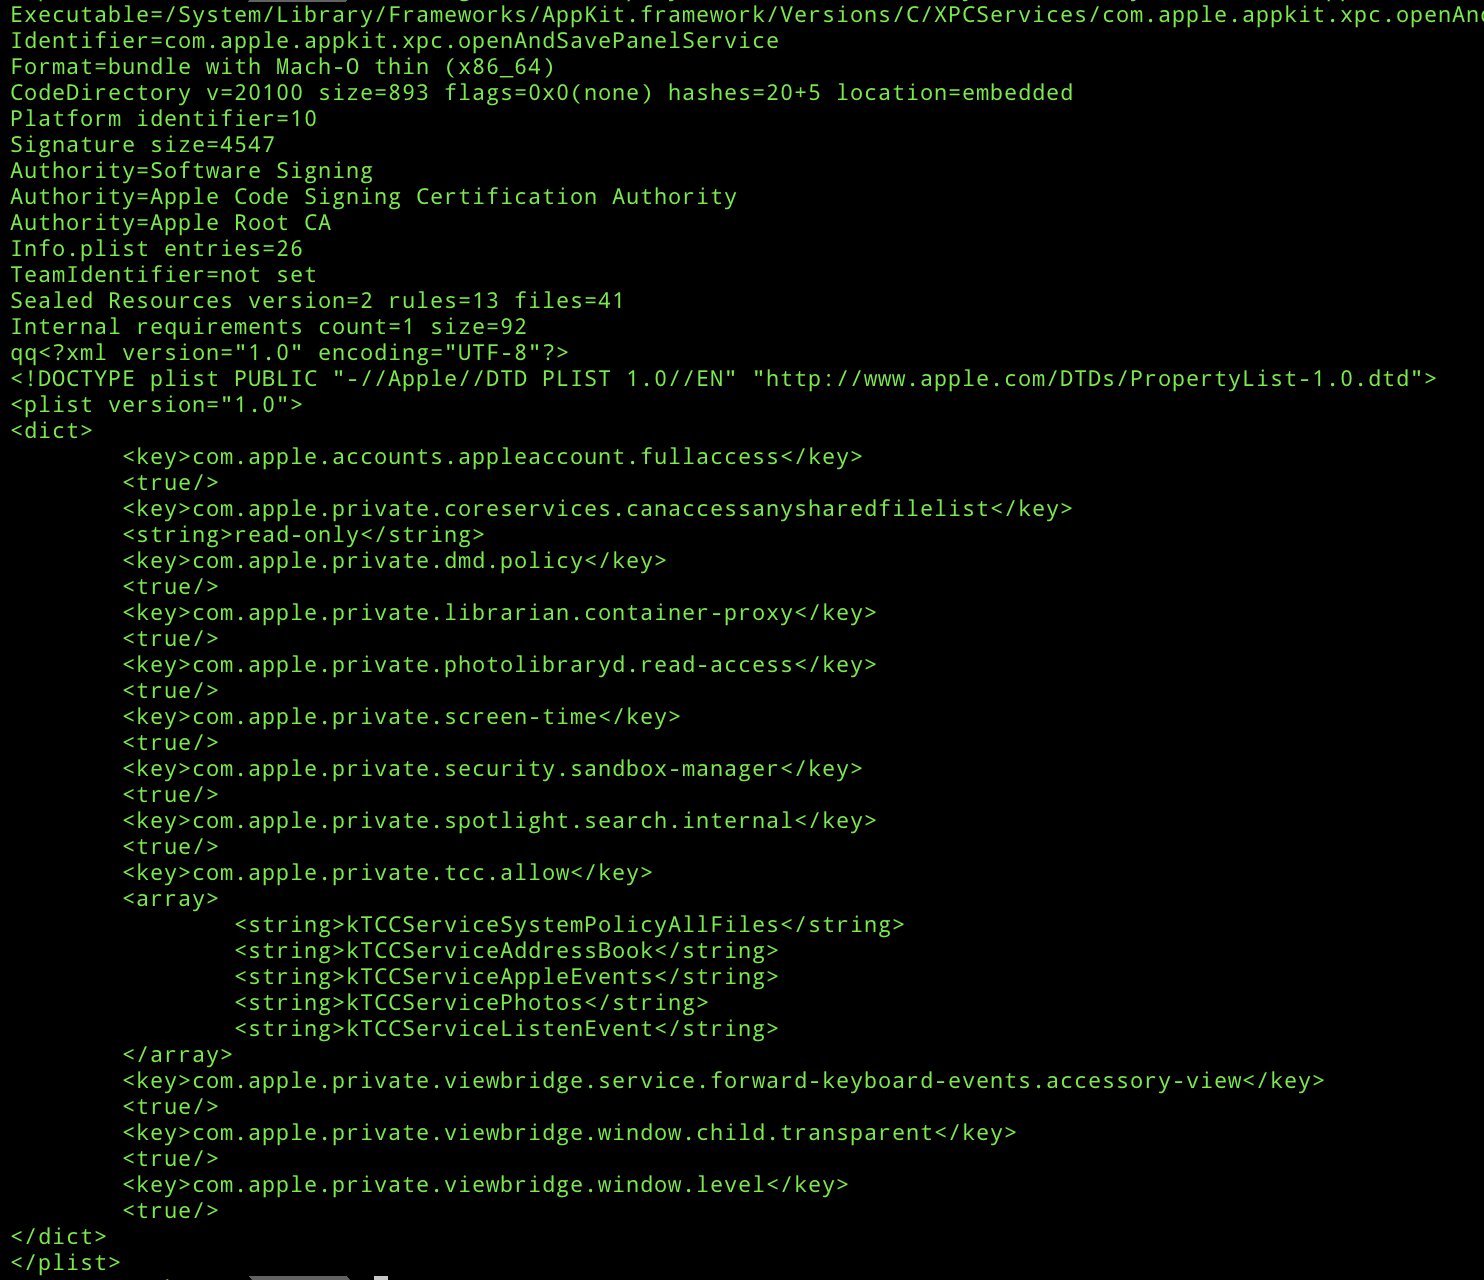
Here we see a number of private entitlements, including the coveted kTCCServiceSystemPolicyAllFiles entitlement which grants access to all files in privacy protected locations without ever prompting the user. Now this makes sense, as MacOS requires the ability to actually access a file regardless of TCC settings before adding a MACL. So surely this is the place that now applies the MACL to our file? Well….. no.
While this service provides the first step of exposing entitlements needed to access our target files without prompting the user, handling of the MACL attribute is actually done by within the kernel, specifically within the Sandbox.kext kernel extension, which means that we need to visit the kernel to understand what is going on.
Kernel Sandbox Extensions
As we go through the imported symbols from AppKit, we find references to a range of functions beginning with sandbox_extension_... These functions wrap calls to the sandbox_ms syscall by invoking the “Sandbox” module and invoking a so called “extension”. In our case we are interested in methods exposed from libSystem.dylib beginning with sandbox_extension_issue_file... and sandbox_extension_consume.
Let’s begin by making a call to one of the methods, sandbox_extension_issue_file_to_self. This call takes 3 parameters:
char* sandbox_extension_issue_file_to_self(const char *sandboxEnt, const char *filePath, int flags);
Upon calling the function and providing the path to a file we have access to, we find that we are returned a string which looks like this:
f6b75b461bada9c3b2e73400359bc8d5844b4a3d4442700fd352fe45bcfd650b;00;00030000;00001b03;003d0fe5;000000000000001a;com.apple.app-sandbox.read;01;01000005;00000000000d1bbf;1d;/users/xpn/documents
What the hell is this monstrosity? Well to understand what we are seeing we will need to load our disassembler and jump into Sandbox.kext.
The function we are interested in is _syscall_extension_issue which takes 2 arguments:
_syscall_extension_issue(proc_t *proc, struct extension_issue_request *req);
After some reversing, the second argument appears to be a struct similar to:
struct extension_issue_request {
  const char *sandbox_string; // 0x00
  int cmd; // 0x08
  const char *filePath; // 0x10
  int flags; // 0x18
  char *returnedToken; // 0x20
  int pid; // 0x28
  int res; // 0x30
}
If we spend a bit of time reversing the function, we can figure out the interesting parts of the token:
f6b75b461bada9c3b2e73400359bc8d5844b4a3d4442700fd352fe45bcfd650b - HMAC-SHA256 of the token
00 - Sandbox extension cmd
00030000 - Flags
00001b03 - PID
003d0fe5 - PID Version
000000000000001a - Size of sandbox string
com.apple.app-sandbox.read - Sandbox string
01 - Does file exist
01000005 - Filesystem ID
00000000000d1bbf - iNode ID
1d - Sandbox Storage Class
/users/xpn/documents - Target file path
Before we move on let’s talk about that HMAC-SHA256 hash for a second. The key used for HMAC is actually generated on loading the sandbox.kext module, meaning that a token is invalidated on reboot.
The key is set to 40 bytes of randomness stored within the _secret variable so bruteforcing is out of the question:

So what can we do with this returned token? Well to understand how this is handled we need to look at another method, _syscall_extension_consume which takes 2 arguments:
_syscall_extension_consume(proc_t *proc, struct extension_consume_request *req);
Again by disassembling this function we find that the passed request likely looks like this:
struct extension_consume_request {
  const char *token;
  int length;
  int *returnValue;
};
So when our token is parsed, what checks are completed? Well first up is the validation of the HMAC-SHA256 hash:

As a side note, if you are like me and was hoping for a timing attack on the HMAC hash to reveal the secret, Apple already considered this:
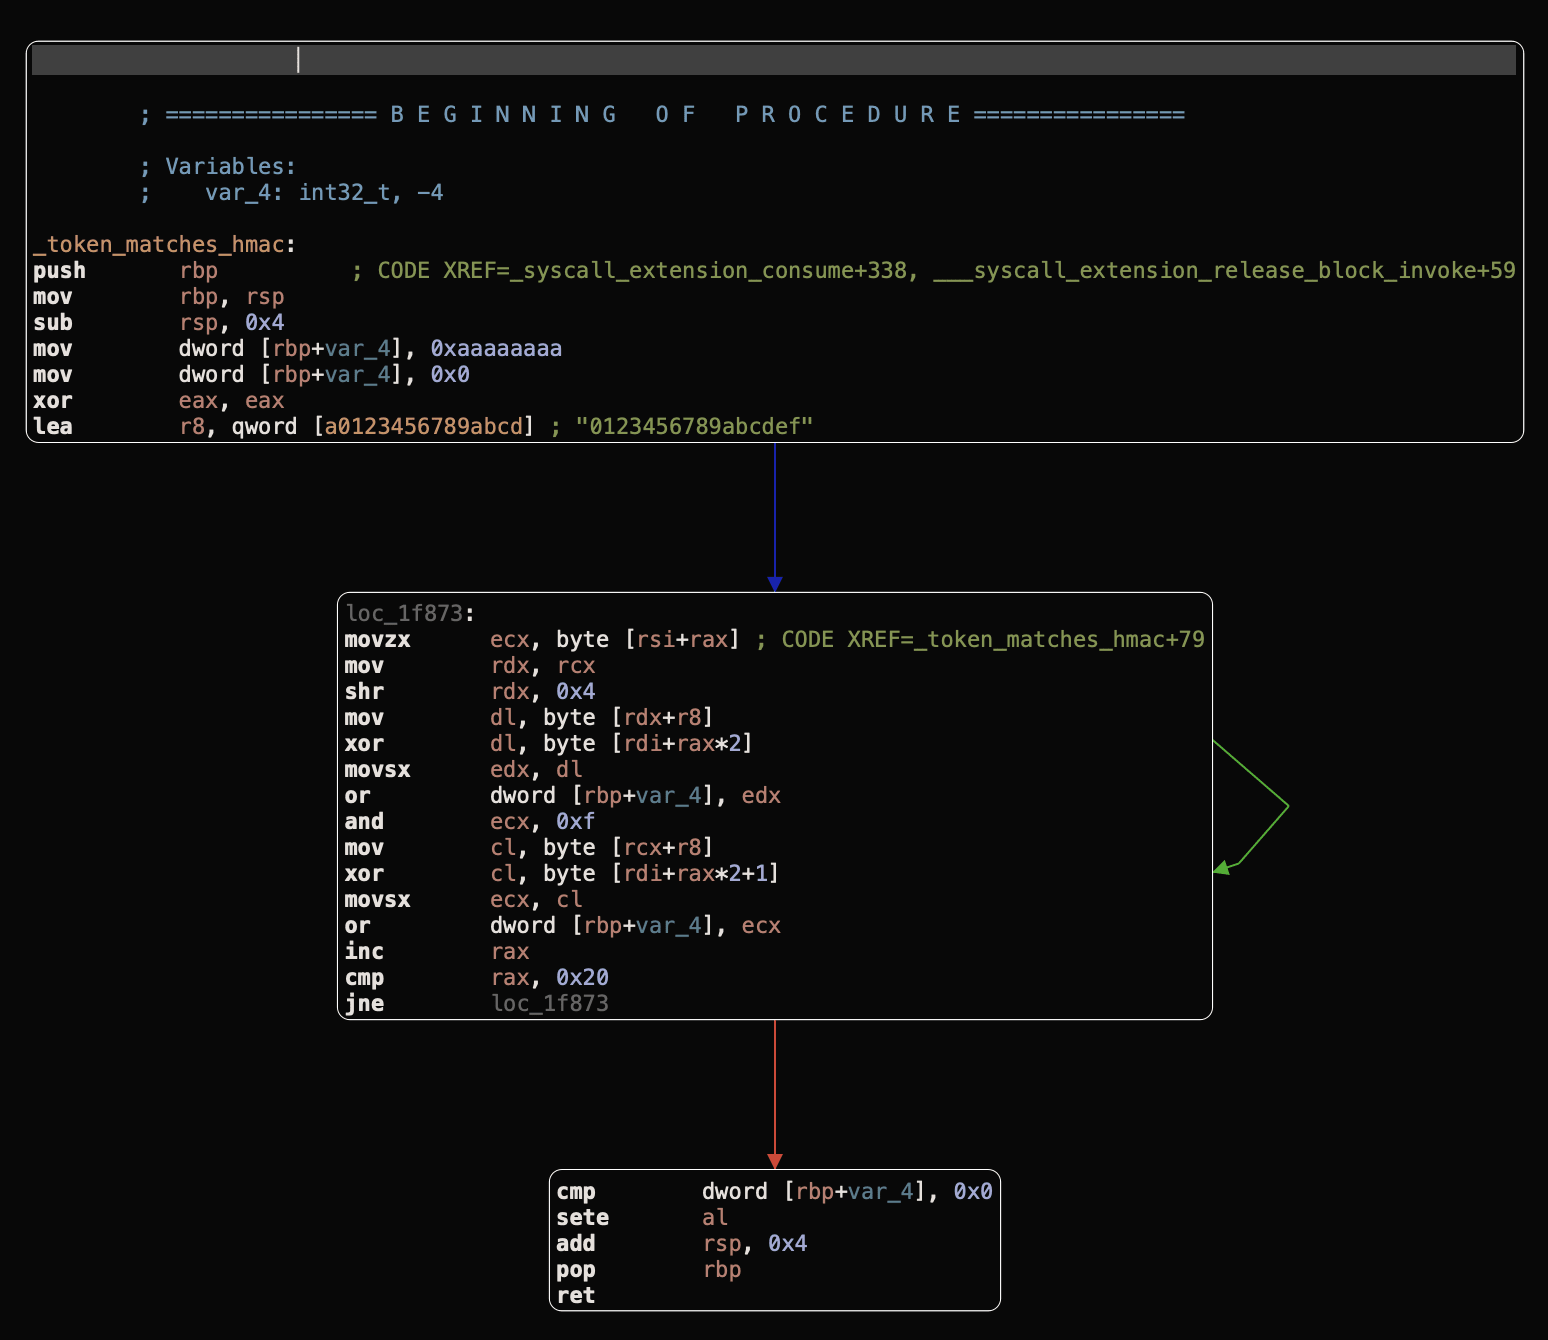
Assuming that the HMAC-SHA256 hash matches, next the PID and PID Version are validated against our calling process to ensure that they match:
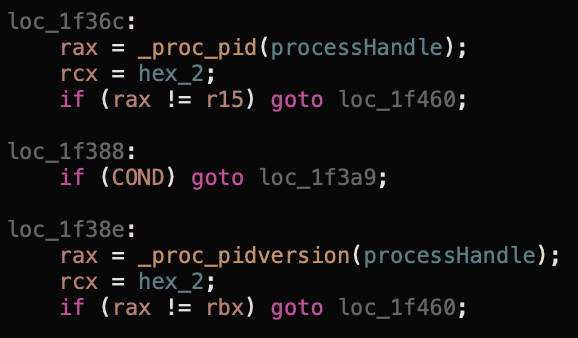
If this is OK we next enter one of 4 paths depending on the Sandbox extension cmd value our token contains. For our purpose this will be 0x00 which takes us to a function of _macl_record with the following arguments:
_macl_record(proc_t *proc, const char *filename, bool fileExists, int fsID, int iNode, int res);
This function performs a number of checks on the passed parameters. First it identified if the inode exists on the filesystem ID passed:

If this file exists, we add our MACL:

Interestingly, if the file is found to not exist via the inode, a lookup is performed based on the Filename instead, and if the filename exists, the MACL is applied:

And there we have it, the User-Intent framework from application to XPC driven dialog to kernel to MACL. Now… let’s hunt for bugs!
Abusing User-Intent To Bypass TCC
So now that we understand how User-Intent works, are there any ways to abuse this to bypass TCC? After understanding the internals of this system, it took a few hours of looking but thankfully there is a situation where we can abuse a bug in this process.
The easiest way that I could find to assign a MACL to a folder we don’t have access to is via a chroot container. This does mean that we will need to have root or sudo privileges to pull this off as we will need permission to make the chroot call, but let’s create a very simple container using something like:
# Add libs and progs required by our POC
mkdir -p /tmp/jail/usr/lib/; cp -r /usr/lib/* /tmp/jail/usr/lib/
mkdir /tmp/jail/bin; cp /bin/bash /tmp/jail/bin

# Add our POC
cp /tmp/poc /tmp/jail/
With our container built, let’s enter the jail with:
# Execute our chroot to grab a token
sudo chroot /tmp/jail /bin/sh -c "mkdir -p /Users/xpn/Documents; /main issue /Users/xpn/Documents"
Once executed, we get:

TADA! We now have a token for the chroot path of /Users/xpn/Documents. Now if we attempt to consume this token:

Hmm, unfortunately this doesn’t work. Well that’s because our inode value still exists, and remember from our earlier research that if the inode exists then it takes precedence over the filename… so let’s adjust our command to remove that directory after our token is generated:
sudo chroot /tmp/jail /bin/sh -c "mkdir -p /Users/xpn/Desktop; /main issue /Users/xpn/Desktop; rmdir /Users/xpn/Desktop"
And this time if we consume our token, we will see that we have access to the Documents folder, bypassing TCC completely:

This of course works for any folder protected by TCC :)
Note: I’m not 100% sure why yet, but the rmdir needs to be executed from within the chroot. If you attempt to do something like rm /tmp/jail/Users/xpn/Desktop, applying the token will not result in access to the protected folder. I’d love to know why this is if anyone has any ideas?
So this has hopefully given you an idea of why TCC sometimes appears to allow what is clearly blocked. It is also hopefully an insight into an apparently simple bug which actually took a bit of understanding of MacOS internals to discover.
As of MacOS 10.15.6, iOS 14, WatchOS 7 and tvOS 14 this bug has now been fixed. Thanks to the Apple security team for making the disclosure process so quick and painless.