AWS Lambda Redirector

A while back I posted a tweet showing AWS Lambda being used as a redirector for Cobalt Strike. At the time I planned on blogging just how this was done, but recently while migrating this blog to a more suitable stack I found the drafted post that was never finished. So I thought I’d dust it off, check that the theory still worked, and make it available… better late than never!
For those who haven’t encountered AWS Lambda, this technology allows you to deploy event driven code to AWS. The deployed function will be invoked by a trigger, for example a file being uploaded to S3, an SMS message being received, or in our case, a HTTP request being received by a gateway. All of the underlying infrastructure responsible for executing this code is abstracted away, meaning that we don’t have to deal with configuring an EC2 instance or rolling out Terraform scripts to get things to work. Lambda also supports development in a number of languages, from Python and NodeJS, to everyone’s favourite… GoLang, which is what we will be using today.
To make life a bit easier we will be leveraging the Serverless framework, which provides a nice environment for developing and deploying our Serverless applications and is something that we’re a fan of at MDSec.
Serverless - AWS Lambda
A number of resources have discussed AWS Lambda and we have seen just how useful this technology has been over the years. Having used this service for a while, one of its benefits is just how quick it is to spin up a new HTTP endpoint, with the added benefit of never having to see the underlying infrastructure or touch a HTTP server configuration.
To demonstrate just how we can deploy an AWS Lambda function, let’s create a simple HTTP “hello world” API in Go using the Serverless framework:
brew install serverless
serverless create -t aws-go
make
sls deploy
Once executed, you will see something like this:
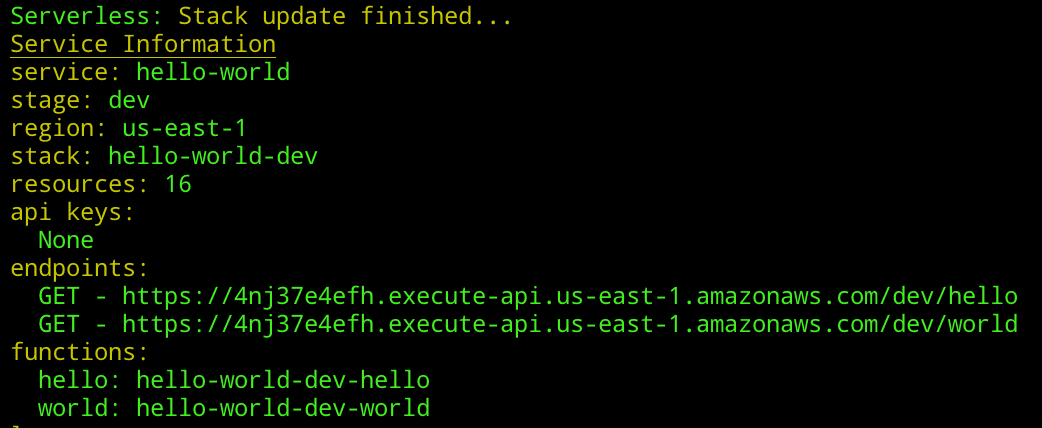
Provided with our endpoint URL, we can make our HTTP request to ensure that our newly created Lambda function is responding as we expect:

Now we can see just how easy it is to create a new Lambda function using the Serverless framework, let’s move on to constructing a service which can front our C2 communication.
Serverless Proxy
Before we begin to proxy requests via AWS Lambda, there is a caveat that we need to consider and will affect our ability to push our C2 traffic via the service. In the above “hello-world” example you may have seen the /dev/ part of the path. In Lambda, this identifies the stage of deployment, such as dev, production, pre-prod etc. We can name this anything we want, but we cannot remove it, meaning that our Cobalt Strike malleable profile will need to consider this when making HTTP requests.
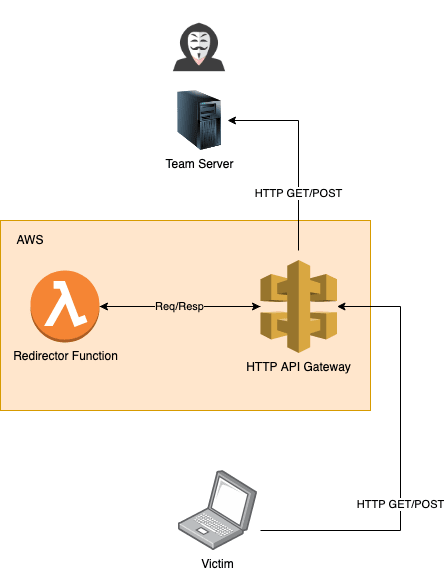
So just how will our infrastructure look once deployed. Well the 2 components we will be leveraging are AWS Lambda, and AWS API Gateway, which will mean that our deployment would have the following structure:
To make this available, we will construct our serverless.yml to be as follows:
service: lambda-front

frameworkVersion: ">=1.28.0 <2.0.0"

provider:
  name: aws
  runtime: go1.x
  stage: api
  region: eu-west-2
  environment:
    TEAMSERVER: ${opt:teamserver}

package:
 exclude:
   - ./**
 include:
   - ./bin/**

functions:
  redirector:
    handler: bin/redirector
    events:
      - http:
          path: /{all+}
          method: any
There are a few things worthy of noting here. First is the HTTP path /{all+}. This allows our Go Lambda function to be called upon any URL being called on our HTTP endpoint. Also note the ${opt:teamserver} value for our TEAMSERVER variable. This allows us to specify a value on the command line during deployment to make life a bit easier.
Now we have a way to bring up our infrastructure, let’s move onto some code.
Serverless Code
Let’s begin by updating the “hello-world” template code to meet our requirements.
To proxy the request from beacon to our team server, we will take the following steps:
- Read the full HTTP request sent from beacon, including any POST body.
- Build a new HTTP request ensuring that the received HTTP headers, query string parameters, and POST body (if included) received from the beacon are used.
- Forward the HTTP request to the team server and receive the response.
- Add the received HTTP headers and body (if included) to the API gateway response.
- Forward the response to beacon.
Once created, our code will look like this:
Once our code is compiled via make, we can then do a sls deploy to push our function to AWS.
Serverless Malleable Profile
Once we have our code deployed, we need to configure Cobalt Strike to work with our endpoint. Now we could of course have gone with something like External-C2, but given that we are dealing with a simple HTTP relay with only a few minor tweaks required such as the stage path, we can just create a malleable profile to accommodate this. Specifically, we need to ensure that both our http-get and http-post blocks contain a uri parameter beginning with /[stage]/.
For example, we could set our GET requests to be sent using:
http-get {
        set uri "/api/abc";
        client {
                metadata {
                        base64url;
                        netbios;
                        base64url;
                        parameter "auth";
                }
        }
        ...
A simple minimal malleable profile which will work with our sample Lambda code would look like this:
Serverless in action
Once we have all of our components ready, we can test that everything works. For testing locally I normally use ngrok which will let me expose a local web server which is perfect for providing our Lambda function with an internal teamserver endpoint.
To spin up ngrok on MacOS, we just use:
ngrok http 443
Note that ngrok rate limits for non-paying customers, so you’ll need to sleep 10 any sessions to avoid your endpoint from being blocked.
Once we have our ngrok host, we will deploy our Serverless configuration using:
sls deploy --teamserver d27658bf.ngrok.io
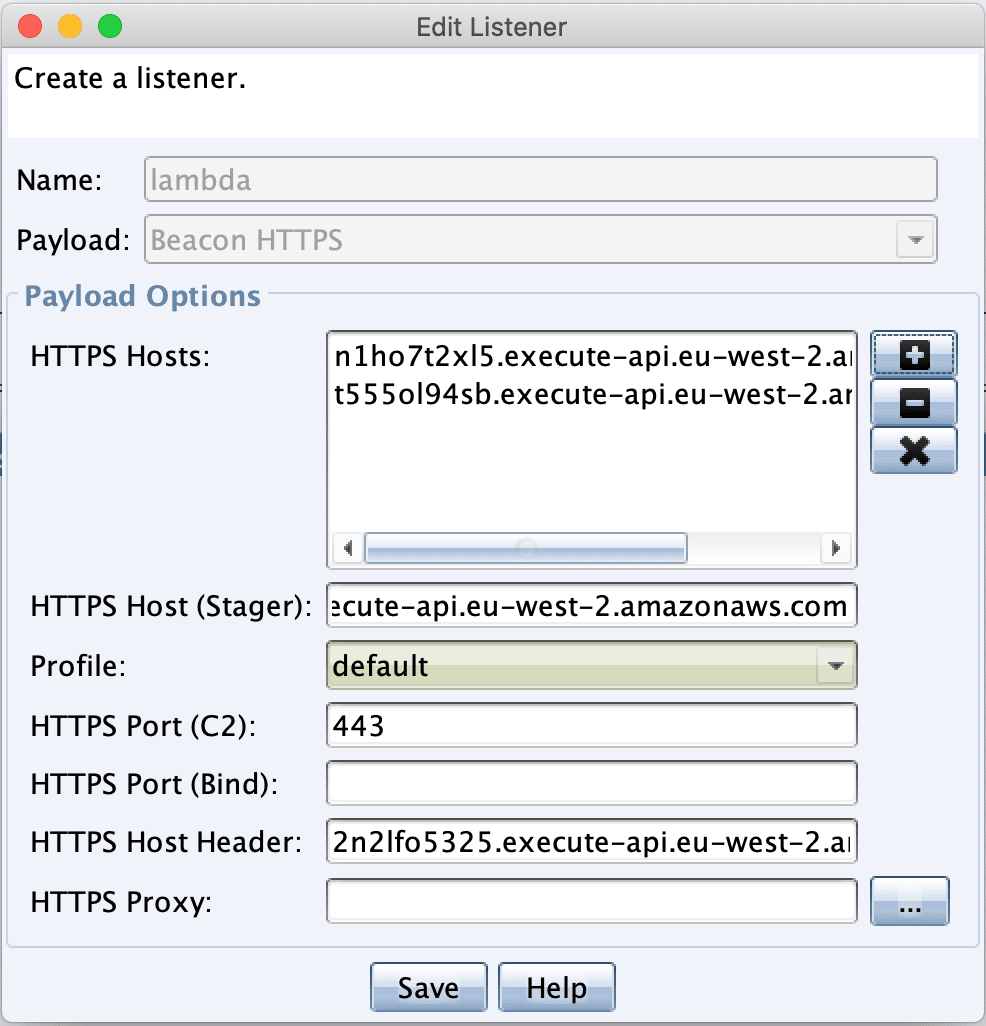
Now all that remains is to fire our your listener pointing to your Lambda URL:

Throw in a few other Lambda URL’s if you wish, it appears that fronting via Lambda URLs works perfectly fine:
And then when the listener is started and with a beacon executed, we will be greeted with a session flowing through Lambda: